User Interface & User Experience
BackOverview
In my final spring semester at the University of Arkansas at Little Rock, I took the “Ultimate Guide to Usability and UX” course taught by David Travis on Udemy as part of my Independent Study class. This course walked us through how to build website UI (user interface) and UX (user experience) that is directly informed by observed user needs. This course focused on how to perform usability studies, building out user personas, and how to make tough decisions for conflicting user needs. Throughout the course we filled out worksheets in the provided student workbook as well as performed our own studies for mock products.
The first thing we were tasked with was to write down two goals to reach by completion of this course, and three questions that we had about UI or UX design.
- Be able to apply learned techniques to my career as a Web Developer to strengthen how I approach web designing.
- Understand concepts well enough to identify areas of improvement in existing websites.
- How many users are needed for an effective usability test?
- How do I know what features to implement if I cannot have them all?
- What are the common misconceptions of UI/UX?
Contextual Interviews
To get us started, David taught us the steps to complete a usability study. First, to gain insightful information we must go to where the user is working and directly observe them using the product - these are called contextual interviews. This is where my first and third questions got answered. I found out that contextual interviews are time intensive since you need at least 20 people to perform the tests on - 5 people of each user type. Despite the daunting amount, it’s possible to get through these tests quickly if you interview more than one person per day throughout the week.
For our first usability study, we had to choose one of five design activities laid out for us. I chose the gift giver activity. The premise of this was that an algorithm had been developed that would predict someone's next purchase based on products they’ve previously gotten and liked. This service was to be used by friends and family to pick better gifts for their loved ones.
Once I chose my activity, it was time to get to work. I outlined topics to focus on using the student workbook’s guide below:

Since this was a learning exercise, we were only required to interview 5 people instead of the full 20. Once I got my topics ready, I contacted 5 of my friends to allow me to conduct contextual interviews with them. Using these topics as a focus, I sat down with each person in their home environment and asked them to pick out a gift for someone they are close with. I recorded the interview as well as took notes about their behavior and what I observed them doing. Every time we were finished, I would gather my notes and the interview audio and fill out the fields in the Contextual Interview Highlights form given to us in the student workbook. Below are my notes on two of the 5 participants, Evan and Trent:


After we conducted the interviews, we were then instructed on how to create a persona from them. This course highlighted the importance of an authentic user persona. David really honed in on the fact that a universal user doesn’t exist. It’s important to design with specific people in mind when creating interfaces so that they are not only usable but also enjoyable to use by the target audience.
We were first tasked with creating three persona groups based on our five interviews. Below are the three that I made using the worksheet provided.
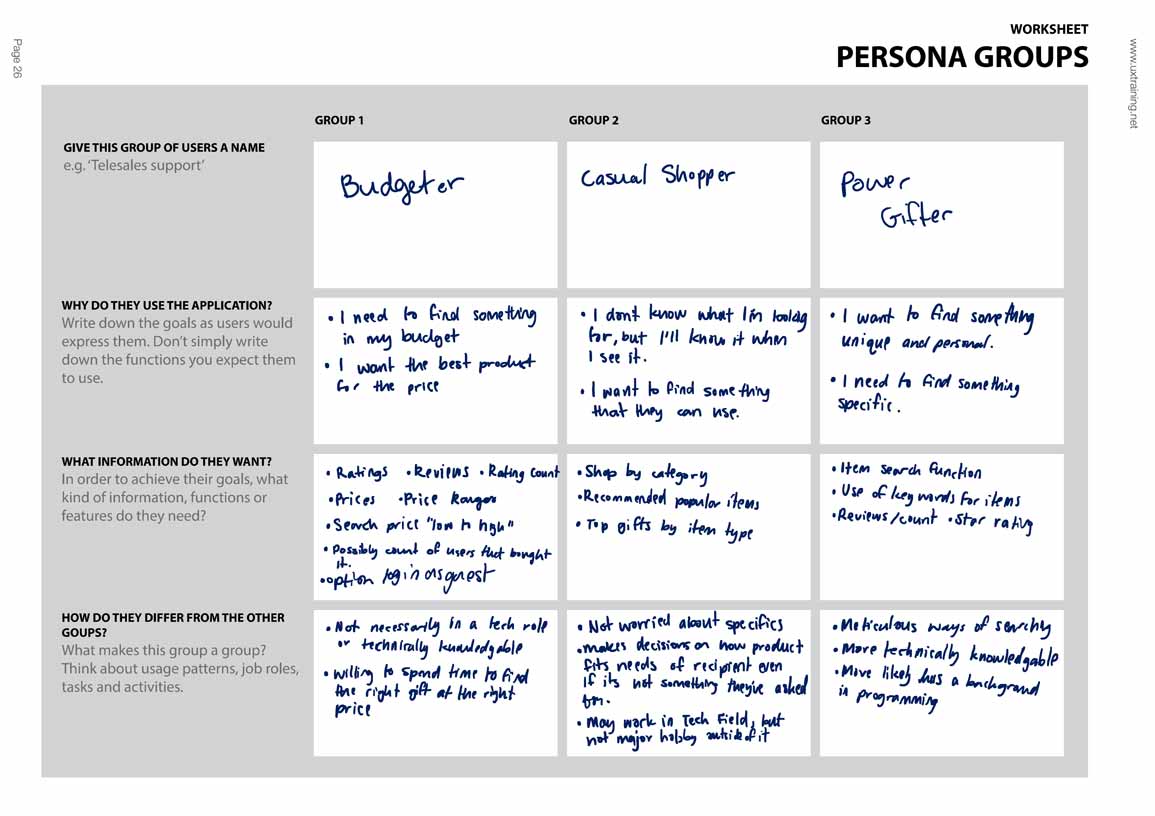
From these three we were then instructed to create an individual persona based on one of the three groups. This persona would be the “Primary Persona” that a design team would work to satisfy in their interface design. This is the most important person to satisfy, because if they are happy with the design, most other users will be as well. These personas are meant to be as authentic as possible and are based on real data observed in our contextual interviews.
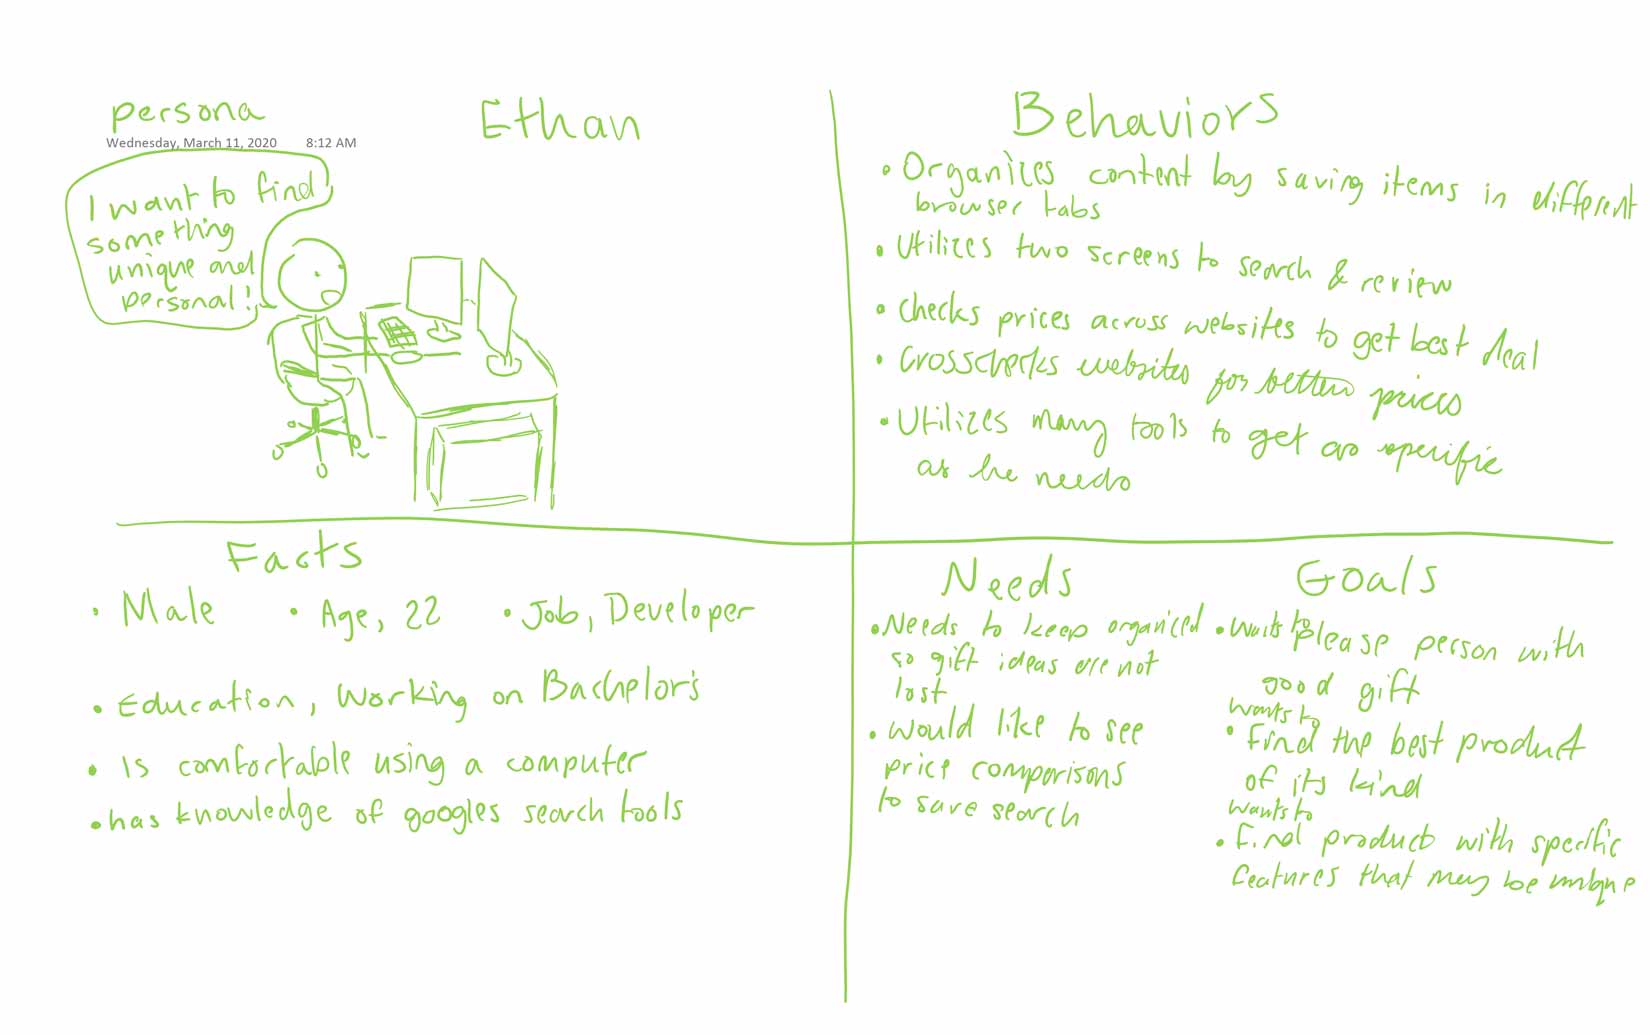
I chose to create my persona around the “Power Gifter” since their needs were the most complex. We were instructed to name them, draw a picture of them in their environment, write down their behaviors, facts about them, and their needs and goals. Below is my completed persona:
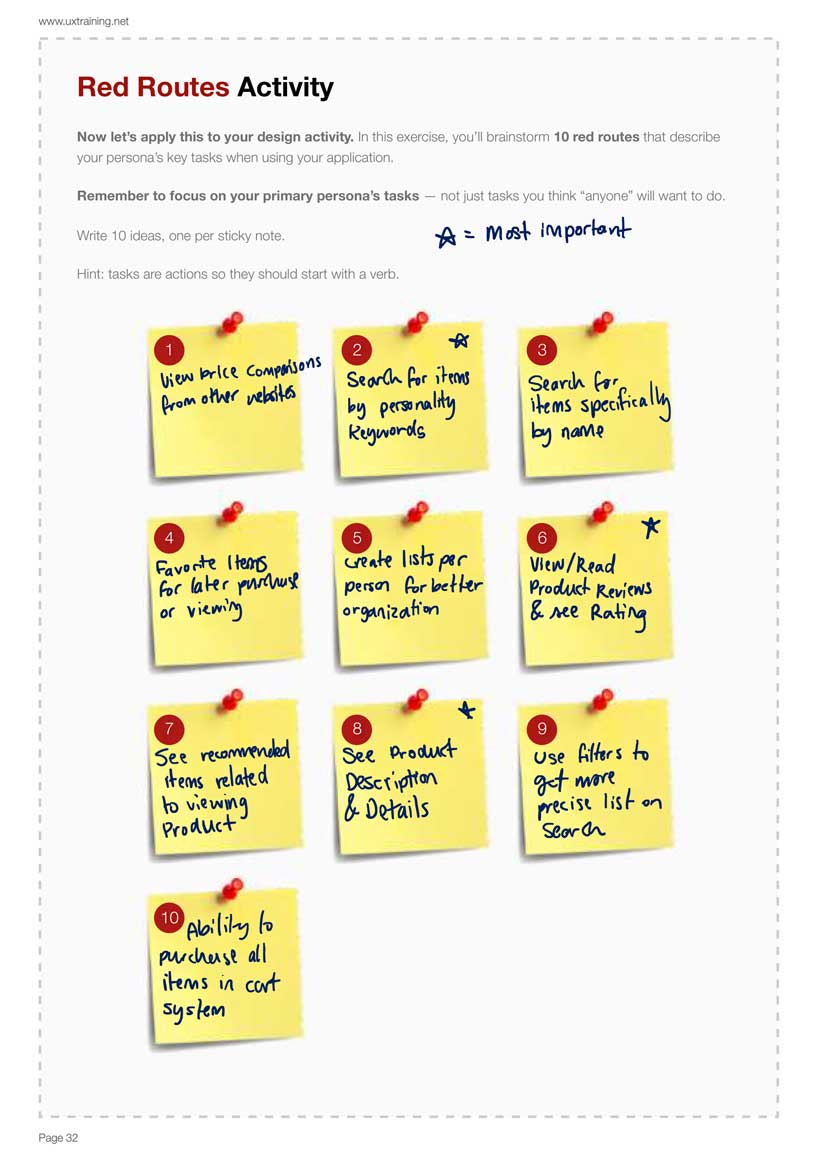
Red Routes
After we completed our persona activity, we then switched gears to discussing red routes. Red routes are the most important parts of the user interface because they are the most frequently used and the most critical to the success of the interface. In our workbook, we were instructed to write down ten red routes based on the persona that we made and then were to mark three of them as the most important. Below are the ten I made:
After the red routes activity, we did a few more activities focusing on user stories and making sure that they are authentic, based on real data, and are something that the user would actually say. Then we got into designing interfaces.
David went over basic design principles in this part of the course. This is where we learned about the CARP method. CARP stands for Contrast, Alignment, Repetition, and Proximity. With these basic design principles in use, you can take any boring block of text and make it more visually interesting to the user. It was at this point that he also discussed usability in the interface context, such as when to use a checkbox versus a radio button, and when it’s appropriate to change the look of these versus when it will be confusing.
Once he went over these basic design principles, it was then time to move on to our prototyping activity.
To ensure that you are going down the right design path, it is important to create many different iterations of the design and then test them. In David’s course, we were instructed on how to create paper prototypes to test with users.
Paper prototypes allow us to create versions more quickly while relying less on the visual design and more on the structure to ensure the usability of the product. Once we finished our first paper prototypes, we were instructed to test these with 3 to 5 different users. We would record their experience as well as observe how easy or difficult it was for them to complete the task, and whether they were successful or not.
Since I took this course in the Spring of 2020, it was also during the beginning of the Covid-19 pandemic. In order to complete the activity I created my design in Figma and used their prototyping tools to allow interaction by the user without anyone being physically close to one another. I created my test scenario based on what my Primary Persona would do, and instructed my test users to complete this task. Here is the link to my figma creation, and below is the test scenario gave to them:
You want to create a new list to do some shopping for your cousin. They really like soft blankets, so pick one out for them and add it to the list.
Once we ran our studies, David walked us through how to analyze the data in our findings. Since we had already finished our Usability Studies, he mainly focused on taking observations and then categorizing them by their severity. He listed out three questions that can determine it:
- What is the impact of the problem?
- How many users are impacted?
- How persistent is the problem repeatedly?
David also discussed Jakob Nielsen’s famous Heuristics and explained how we could determine design flaws using these principles as well. By using both methods, one can weed out many design flaws and create a stronger product that utilizes user focused design. Once the data is analyzed, you then take what you learned and create another prototype fixing the flaws and re-test it until the product stands up to the test.
Conclusion
I can confidently say looking back at this course that I met my goals, and that all my questions were answered. I believe this course strengthened my ability to take real user needs and implement them into new designs as well as existing ones. Before we got into the meat of the course, we were given a lot of material to think about on how users think and the disconnect between how users actually act and how designers think they act. Being able to have the concepts explained and then run practical tests really helped give me insight into how everything actually works and solidified the concepts through learning by doing. I now have a plethora of resources to aid me in decisions regarding features to keep and tweak or features that can be removed. I was able to get an understanding of how much time and effort you have to put into Usability tests which will aid me in managing time, gathering the proper amount of users, and running a test that is both effective and yields usable results.